I am using the graphics from the previous version, with slight modifications. If you want to follow along, download the file
lesson_1.fla (click right on thelink and select "save file").
When you open the file in your flash authoring tool you should see something similar to this:

The library contains three symbols: SHIPSHAPE contains an image of the ship without a rocket plume, and the symbol plume contains an image of the ship with a rocket plume. The symbol "rocketship" contains "plume1" which is an instance of "plume" and "hull1" which is an instance of "SHIPSHAPE." Let us now drop an instance of "rocketship" onto the main time line and give it the instance name "redship." Next, select "redship" and open the actions window. Enter the following code:
onClipEvent(load) {
	plume1._visible = false;
}
onClipEvent(enterFrame) {
	if (Key.isDown(Key.LEFT)) {
        _rotation--;
    }
    if (Key.isDown(Key.RIGHT)) {
        _rotation++;
    }
    if (Key.isDown(Key.UP)) {
        plume1._visible = true;
    }
    if (Key.isDown(Key.DOWN)) {
        plume1._visible = false;
    }
}
When you test the movie, you should be able to turn the plume on and off and rotate the rocket left and right.

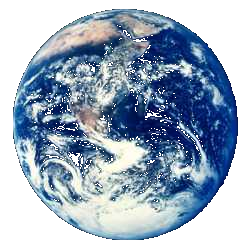
We want to start in orbit about the earth, so create a clip called "PLANET" and import the following image of the earth to the stage:

Now drop PLANET into the main timeline and name the instance "earth." Add the following code to the onClipEvent(load) section of the rocketship actionscript:
	W = 1024;
	H = 768;
	_x = (W+300)/2;
	_y = H/2;
	_root.earth._x = (W-_root.earth._width)/2;
	_root.earth._y = (H-_root.earth._height)/2;
Let's make the document background a deep blue and test the movie.

In the next lesson, we will implement the physics of orbital motion and maneuvering.
To start the next lesson, click here.