A Graphical User Interface for Blender |
|---|
Some of us have been kicking around the idea of using Graphical User Interfaces (GUI's) to help structure and improve the work flow (at least in part) of modifying content in the The Movies Game. Recently, I decided to put some effort into studying the way GUI's can be implemented in Blender (2.49) using python. This article describes my first attempt to put together a GUI to perform some basic tasks; it is not complete and will probably need to be redone in the future, but it is a work in progress and represents an opportunity to explore some of the capabilities and pitfalls of GUI's in Blender.
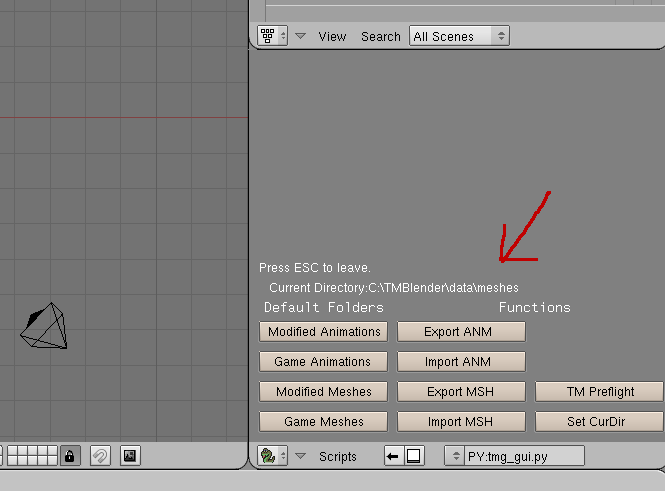
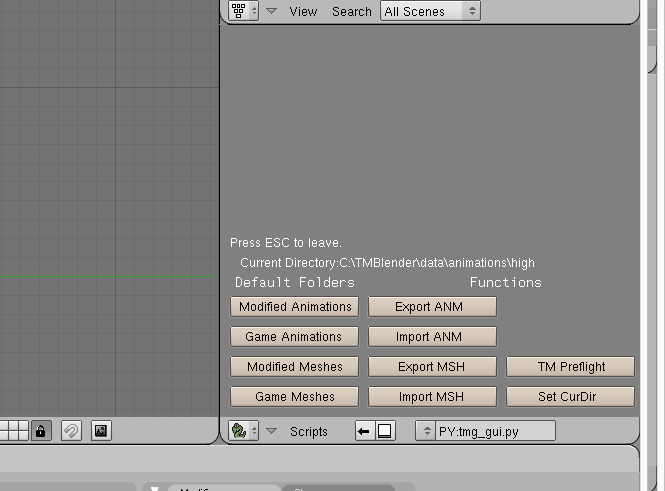
The script is called "tmg_gui.py" and you start it by opening the file in the text window and executing it as a python script. The first screen shot shows the GUI running in an empty scene.

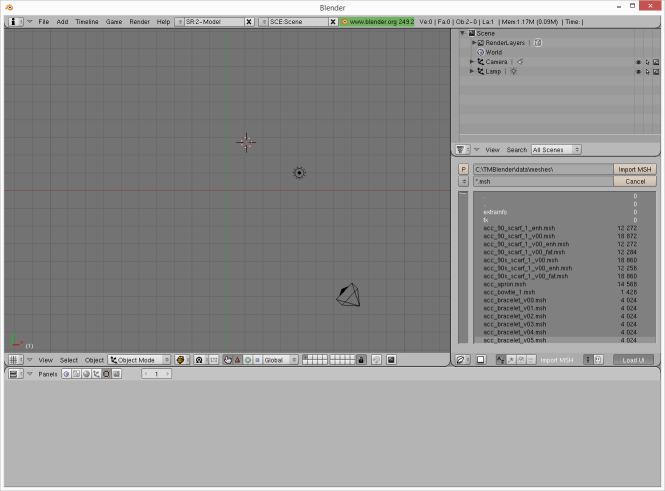
Figure 1: The GUI is started in an empty scene. The GUI script draws a bunch of buttons and labels in the python console window, then sits there waiting for something to happen, such as a mouse or keyboard event. As you can see, there are currently 10 buttons. The current blender directory is displayed as text above the buttons. The first four buttons allow you to choose one of four predefined directories as the current blender directory. The idea is to save some of the tedium of navigating around your hard drive in the File Selector looking for files. The remaining buttons are there to perform a function by running some python code. For example, if you press "Import Mesh" the GUI will run a script to import a movies game mesh file (MSH). The script used here is virtually identical to msh_import_2009.py, but a few lines of code were changed to make it a module which can be imported into the GUI program. With the current directory set as shown, if you press "Import Mesh" the file selector window will open in the Blender program directory and you would then have to navigate to the folder where your meshes are stored. Instead, you can press one of the first two buttons under "Default Folders" to set the Blender directory to one of your default mesh folders. I have the Game Meshes button pointing to "C:/TMBlender/data/meshes" which is where I keep a copy of all the mesh files extracted from the game PAK files using MED. The Modified Meshes button points to "C:/The Movies/data/meshes" which is where you place your modified meshes to make them available in the game. Let's import Woody to simulate an action we might take in creating a mod. First, press "Game Meshes."
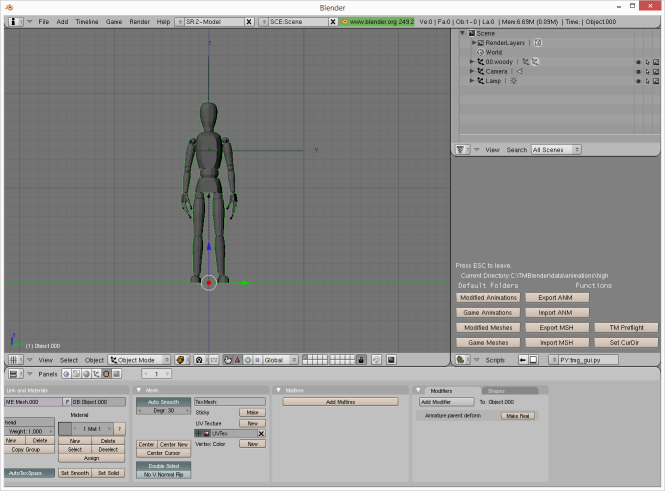
Figure 2: Press Games Meshes sets the Current Directory to folder containing unmodified game meshes
Nothing much happens except the window now indicates the Current Directory is "C:/TMBlender/data/meshes."
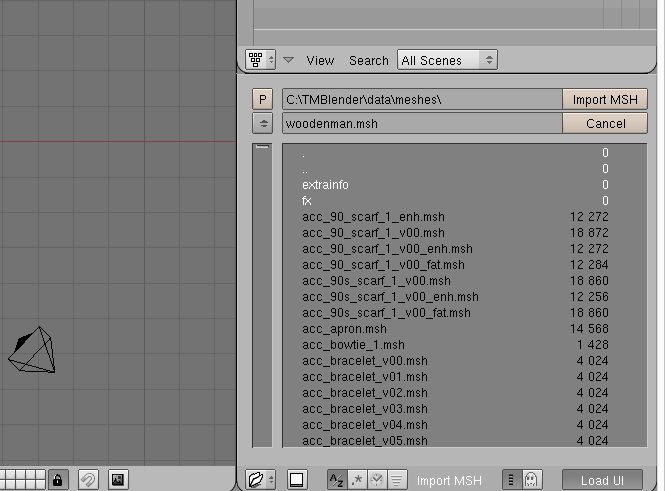
Figure 3: Pressing Import Mesh causes the file selector to open in the current directory.
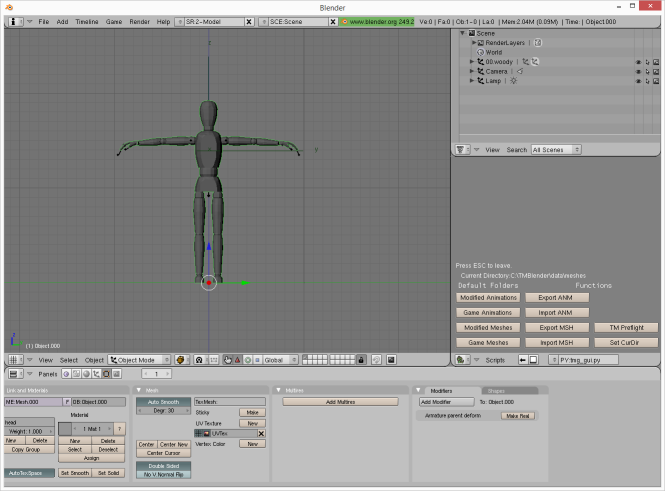
Let's just type in "woodenman.msh" and get on with it.
Figure 4: Select the MSH file to import just as you normally would
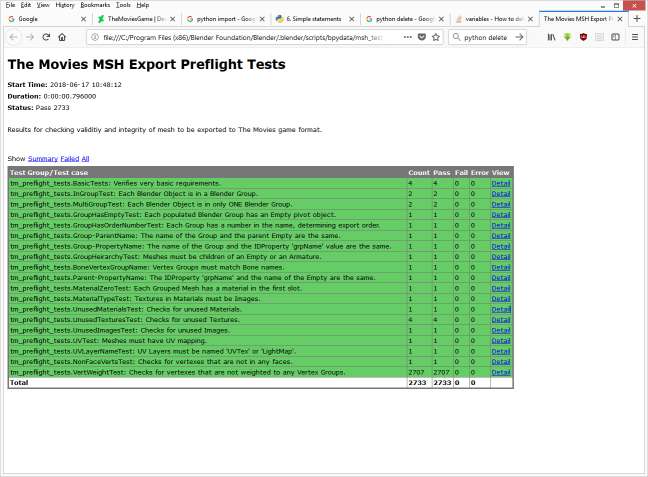
Now let's try the TM Preflight test.
Figure 6: TM Preflight Test results displayed in the browser.
This is basically the standard tm_preflight.py script, slightly modified to be run as a module inside the GUI.
Figure 7: Pressing the "Game animations" button sets the working current blender directory to our animations folder.
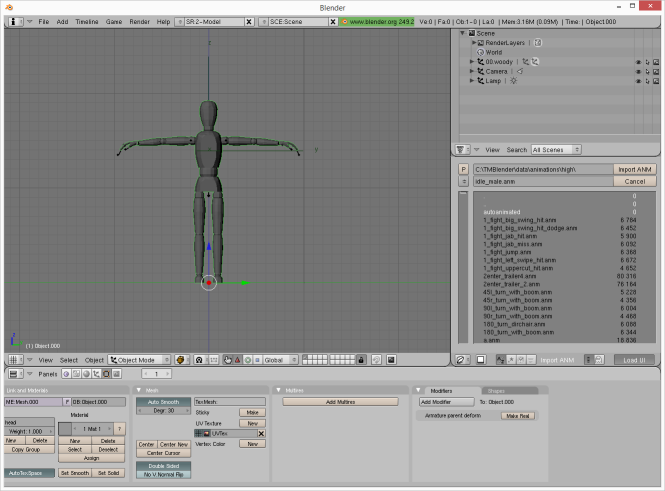
Figure 8: Press "Import ANM" button and the file selector opens in the current directory.
We select the idle_male.anm file for import.
Figure 9: The idle male animation is imported. What you have seen is no more than a crude prototype, a test module, intended to illustrate some of the possibilities for use of Blender GUI's for managing and modifying The Movies Game digital assets. I don't plan to distribute this very early version but I would like to hear from potential users of such a tool and find out what ideas and suggestions they might have for future development.
Thank you for reading.
#---------beginning of code
import Blender
from Blender import Draw, BGL

mystring = ""
mymsg = ""
toggle = 0

def event(evt, val):    # the function to handle input events
    global mystring, mymsg

    if not val:  # val = 0: it's a key/mbutton release
      if evt in [Draw.LEFTMOUSE, Draw.MIDDLEMOUSE, Draw.RIGHTMOUSE]:
        mymsg = "You released a mouse button."
        Draw.Redraw(1)
      return

    if evt == Draw.ESCKEY:
      Draw.Exit()                 # exit when user presses ESC
      return

    elif Draw.AKEY <= evt <= Draw.ZKEY: mystring += chr(evt)
    elif evt == Draw.SPACEKEY: mystring += ' '
    elif evt == Draw.BACKSPACEKEY and len(mystring):
      mystring = mystring[:-1]
    else: return # no need to redraw if nothing changed

    Draw.Redraw(1)

  def button_event(evt):  # the function to handle Draw Button events
    global mymsg, toggle
    if evt == 1:
      mymsg = "You pressed the toggle button."
      toggle = 1 - toggle
      Draw.Redraw(1)

def gui():              # the function to draw the screen
    global mystring, mymsg, toggle
    if len(mystring) > 90: mystring = ""
    BGL.glClearColor(0,0,1,1)
    BGL.glClear(BGL.GL_COLOR_BUFFER_BIT)
    BGL.glColor3f(1,1,1)
    Draw.Toggle("Toggle", 1, 10, 10, 55, 20, toggle,"A toggle button")
    BGL.glRasterPos2i(72, 16)
    if toggle: toggle_state = "down"
    else: toggle_state = "up"
    Draw.Text("The toggle button is %s." % toggle_state, "small")
    BGL.glRasterPos2i(10, 230)
    Draw.Text("Type letters from a to z, ESC to leave.")
    BGL.glRasterPos2i(20, 200)
    Draw.Text(mystring)
    BGL.glColor3f(1,0.4,0.3)
    BGL.glRasterPos2i(340, 70)
    Draw.Text(mymsg, "tiny")

Draw.Register(gui, event, button_event)  # registering the 3 callbacks
#----------- end of code
Run the script in a text window so see what it does.
|
| Return to Index |
